How to Upload an Email Template in Campain Monitor
In this tutorial, we’ll show you how to upload a custom HTML email template in Campaign Monitor using a template from MailPizzeria.
Before you start you need
- Purchased a template from MailPizzeria
- A Campaign Monitor account
Upload your email template on Campaign Monitor
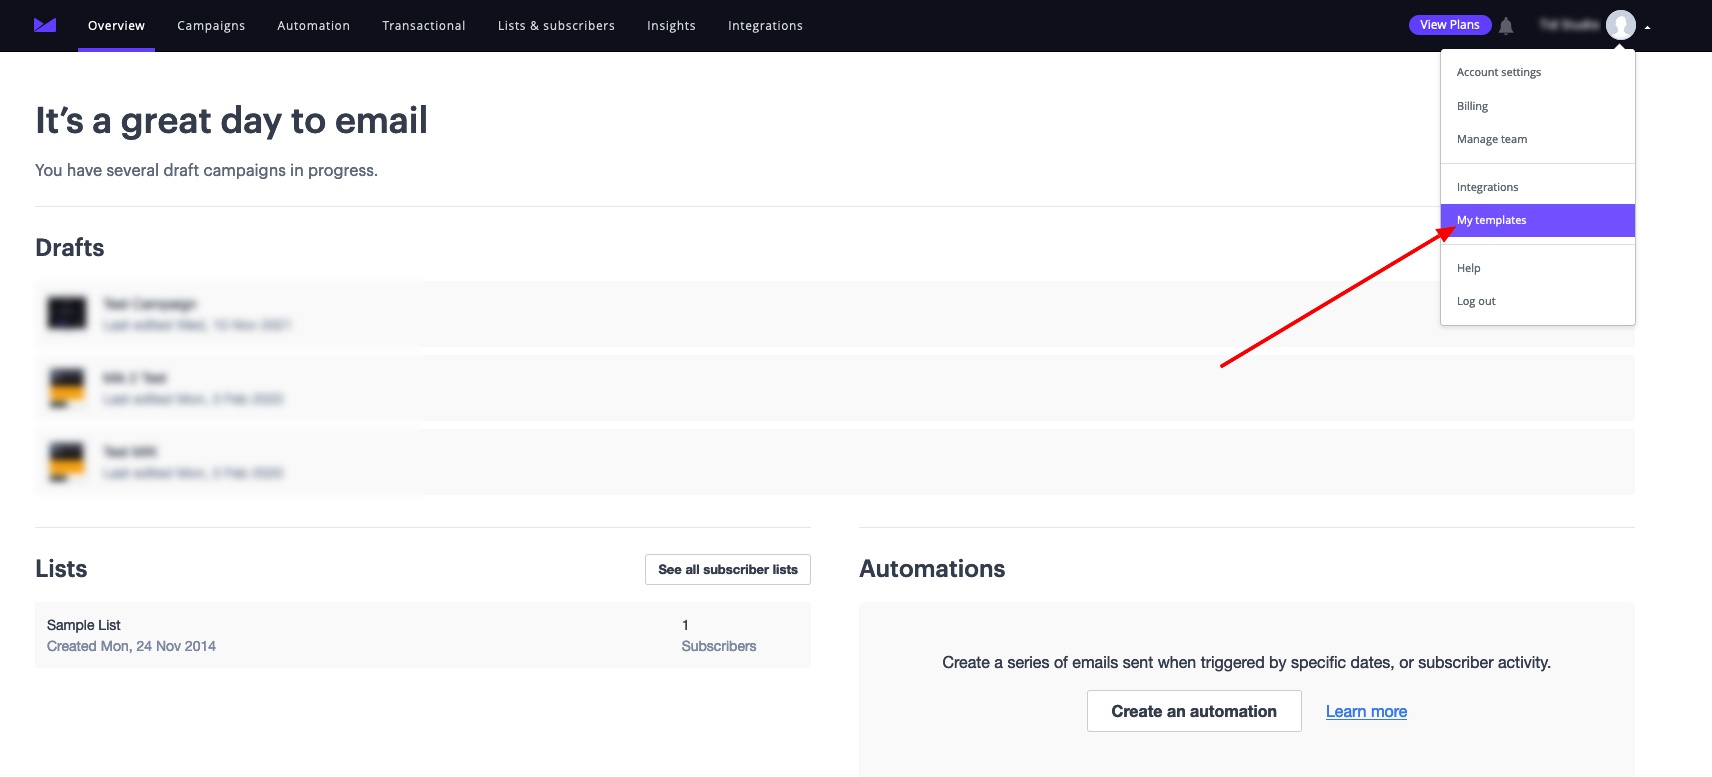
Click on the “My Templates” as you see on the screen.
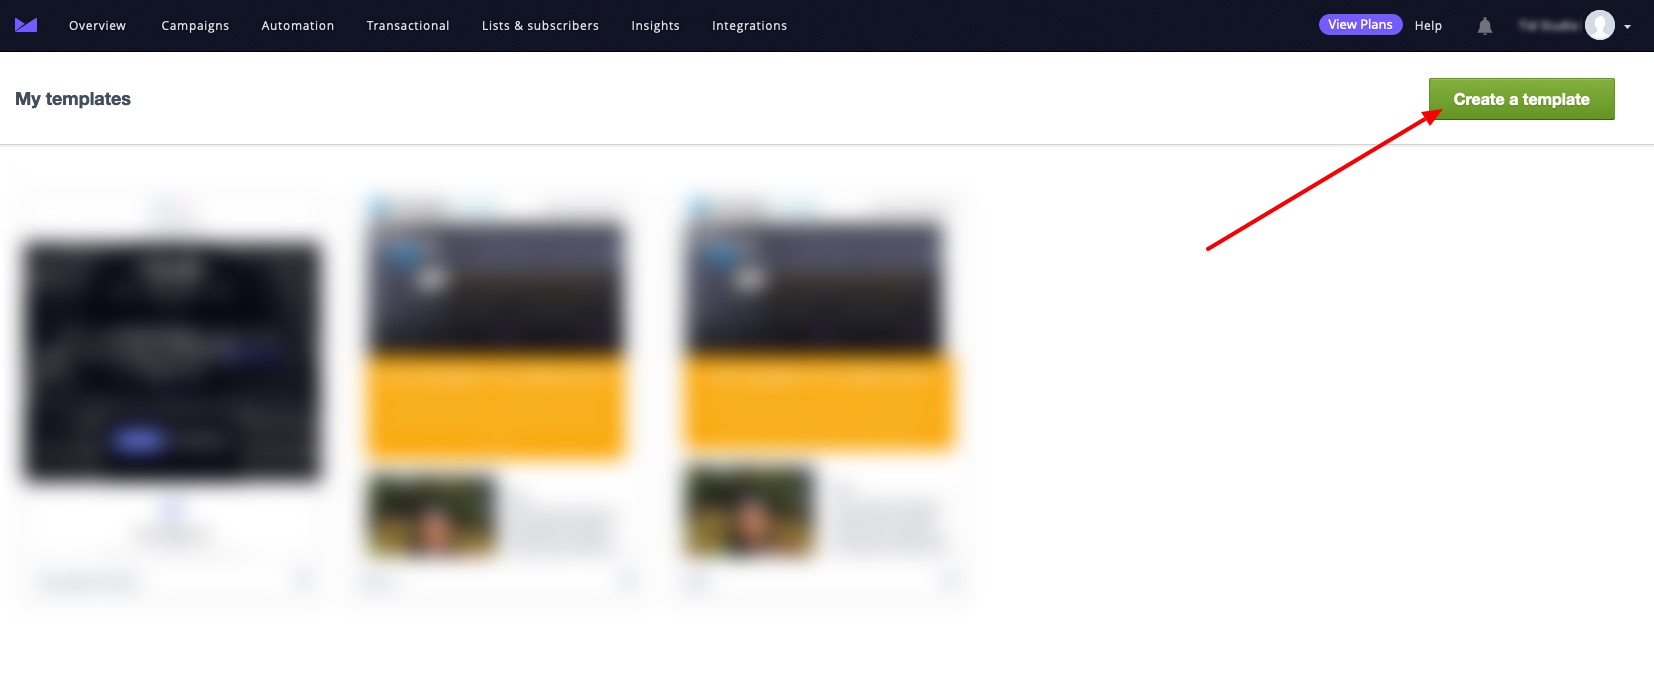
Click on the “Create a new Template”.
Click on the “Upload your own HTML”.

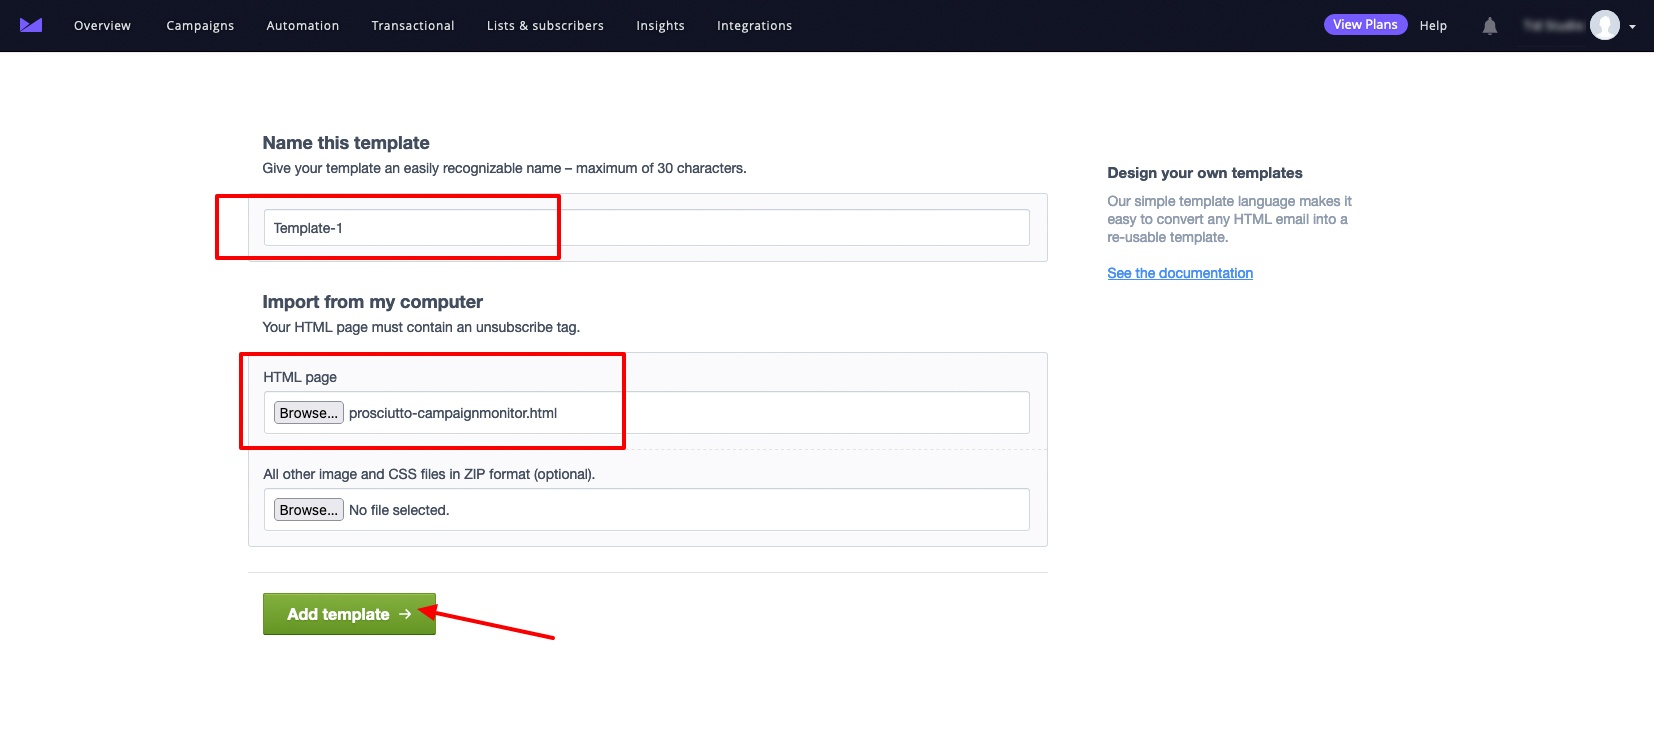
Name your template
Click on the “Create campaign”.
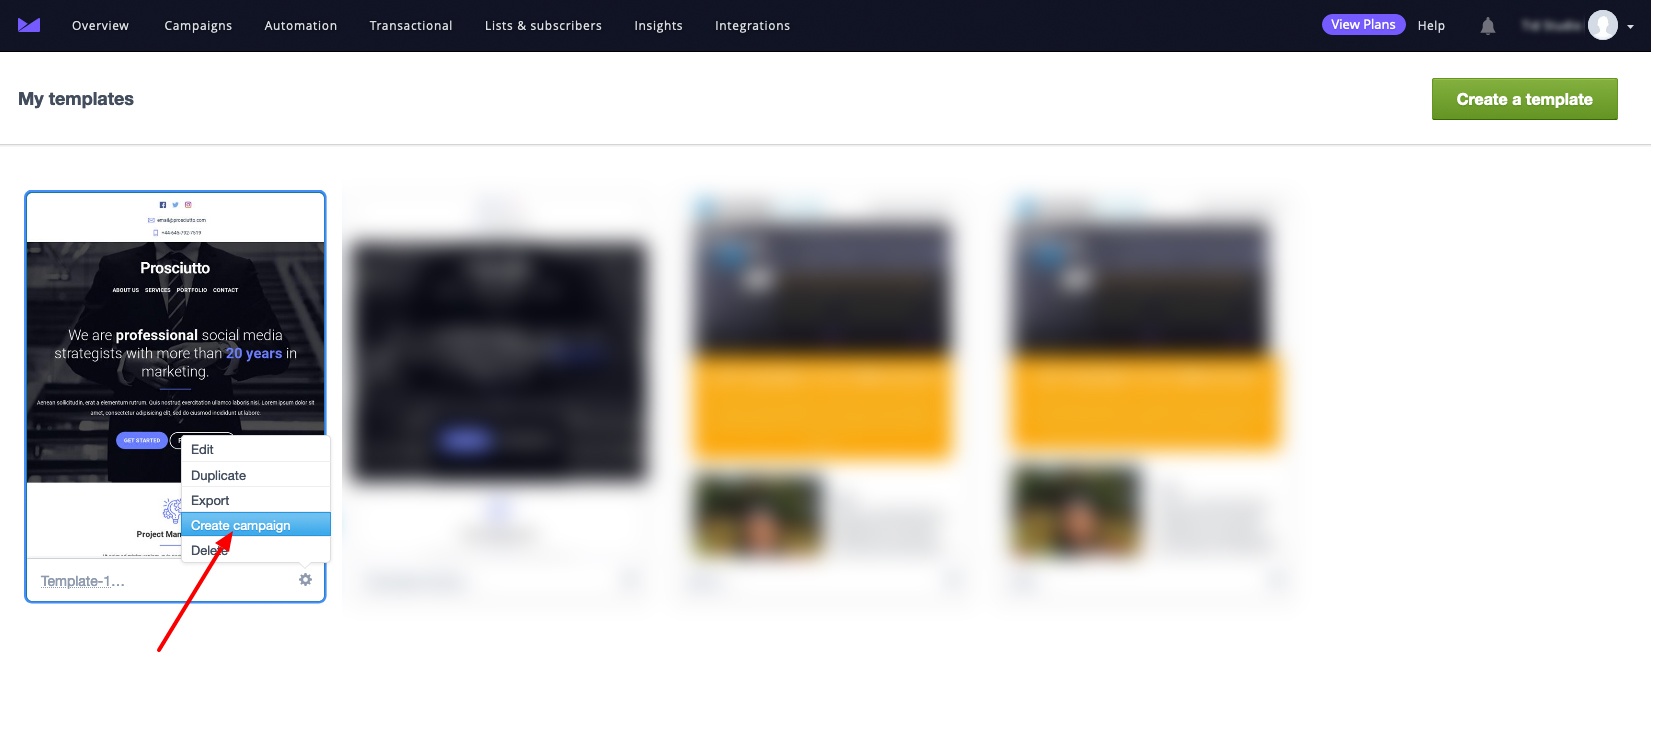
Name your campaign. On the top right of your screen just click on the drop-down menu and choose the modules of your choice. By clicking “Edit”, you can change the content of the text on the left column.
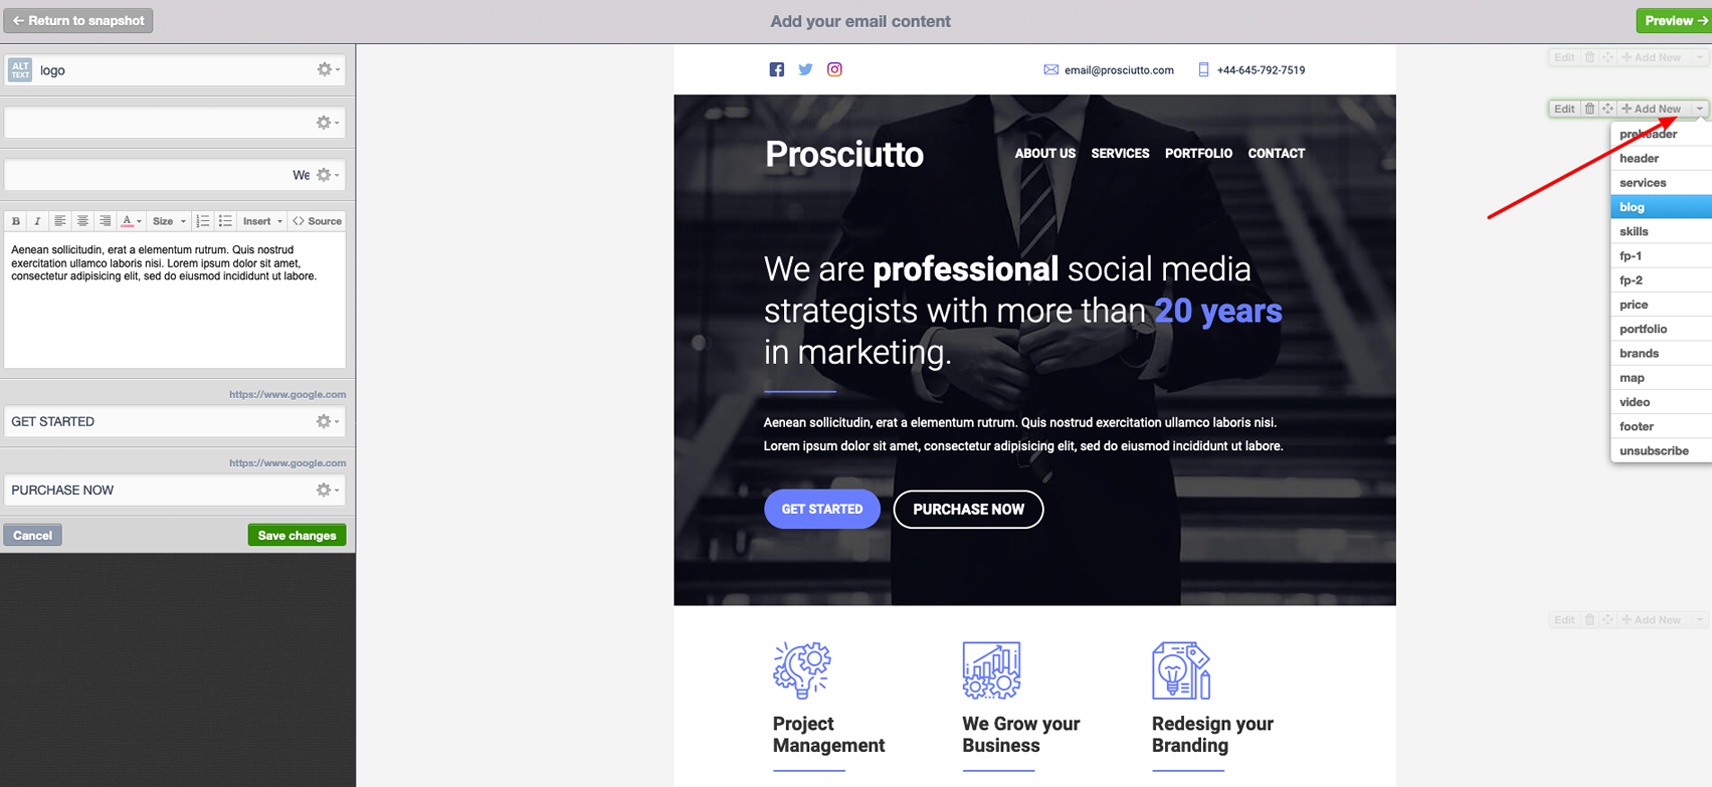
You can continue adding modules in order to build your template. You can re-arrange or delete any unnecessary modules.
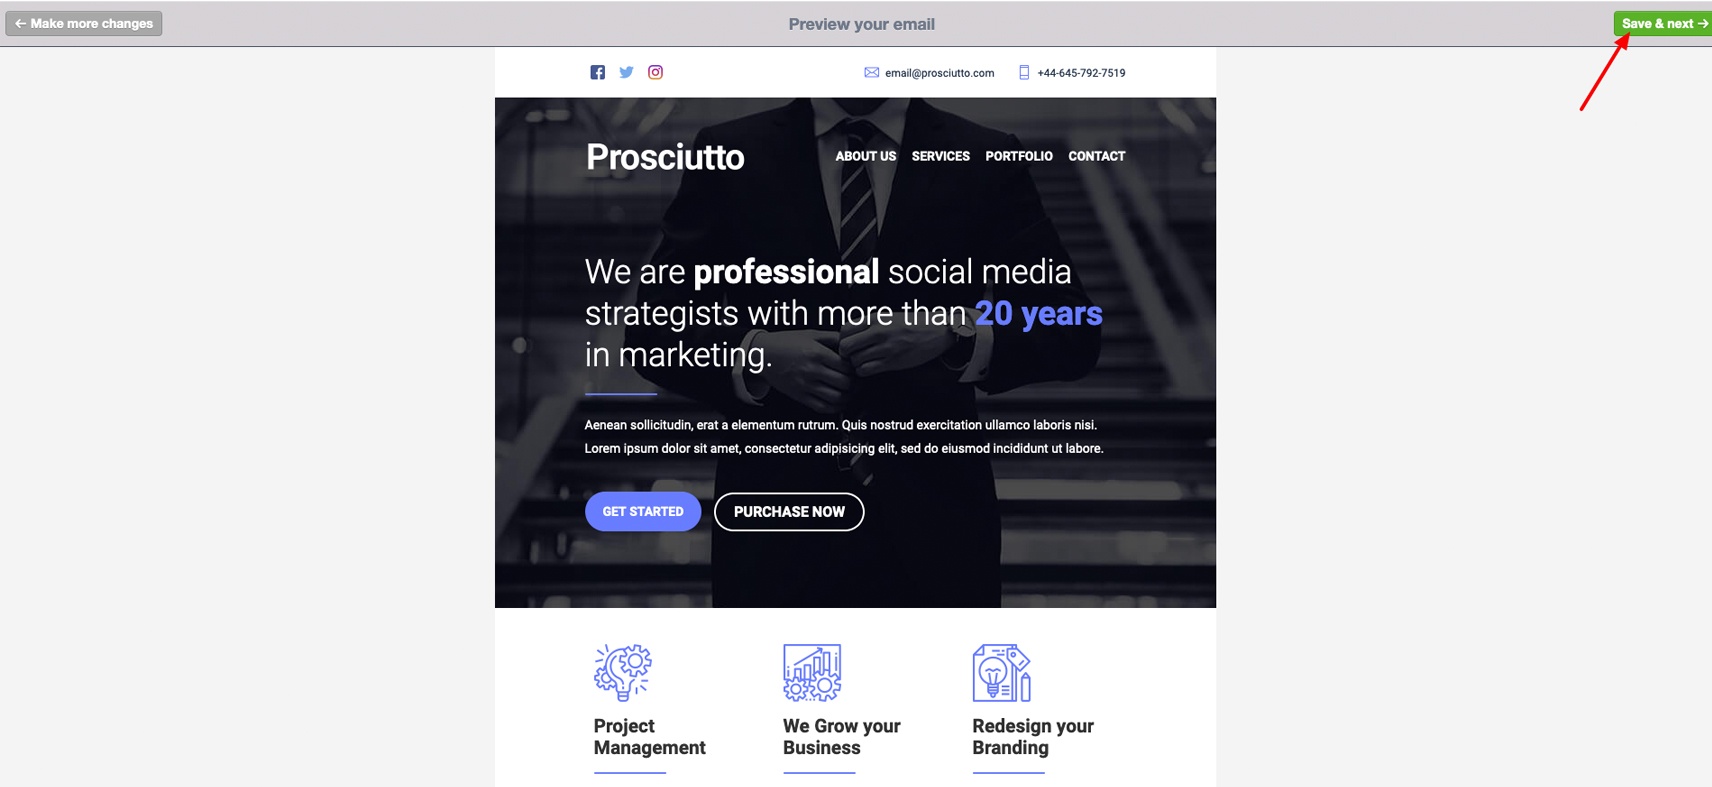
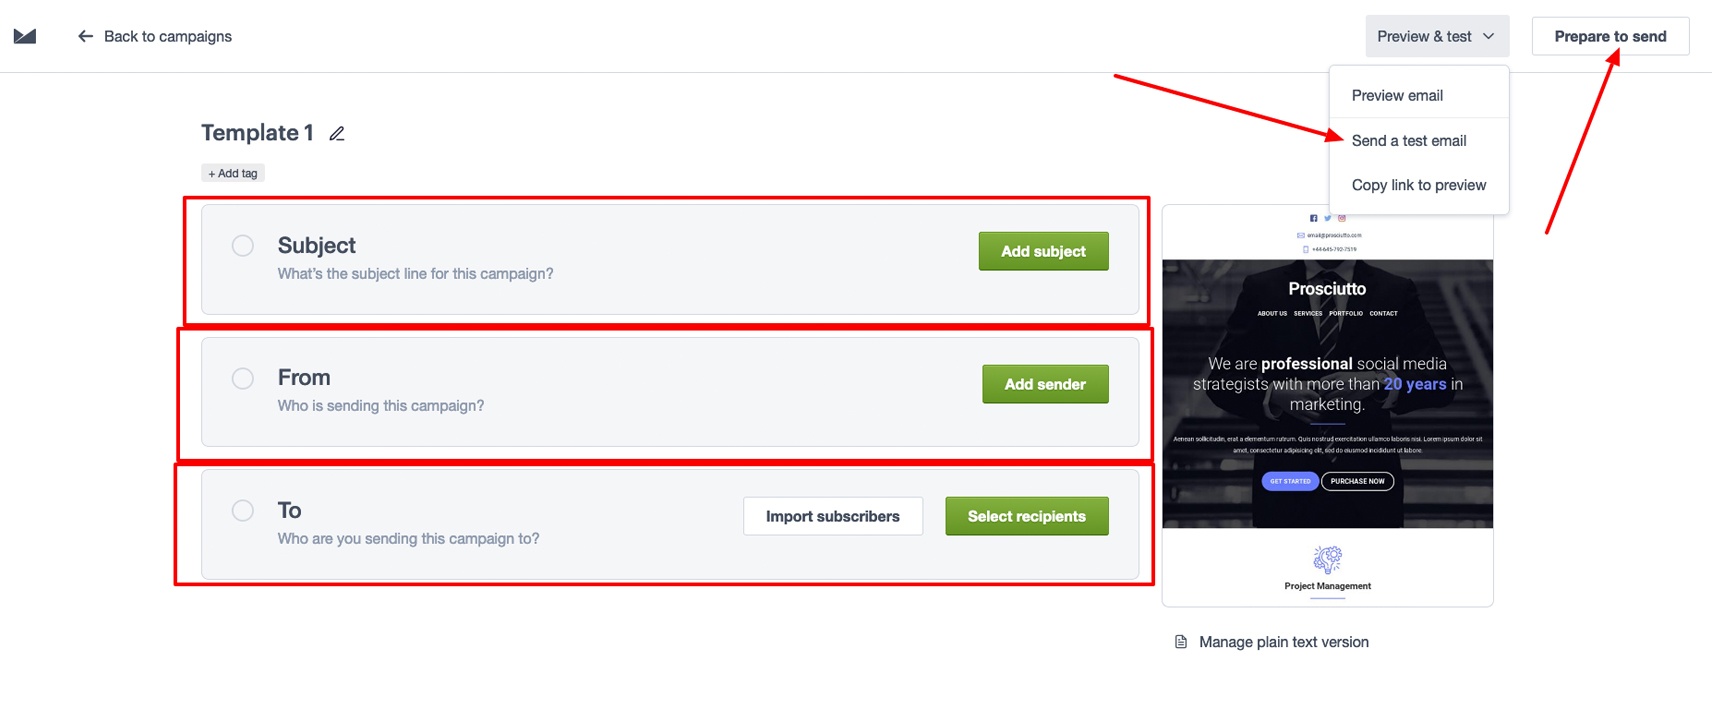
When you finish the build of your template you can click “Preview” and check your template with all modules. By clicking “Prepare to send” you will continue to send your campaign.
Outlook issues
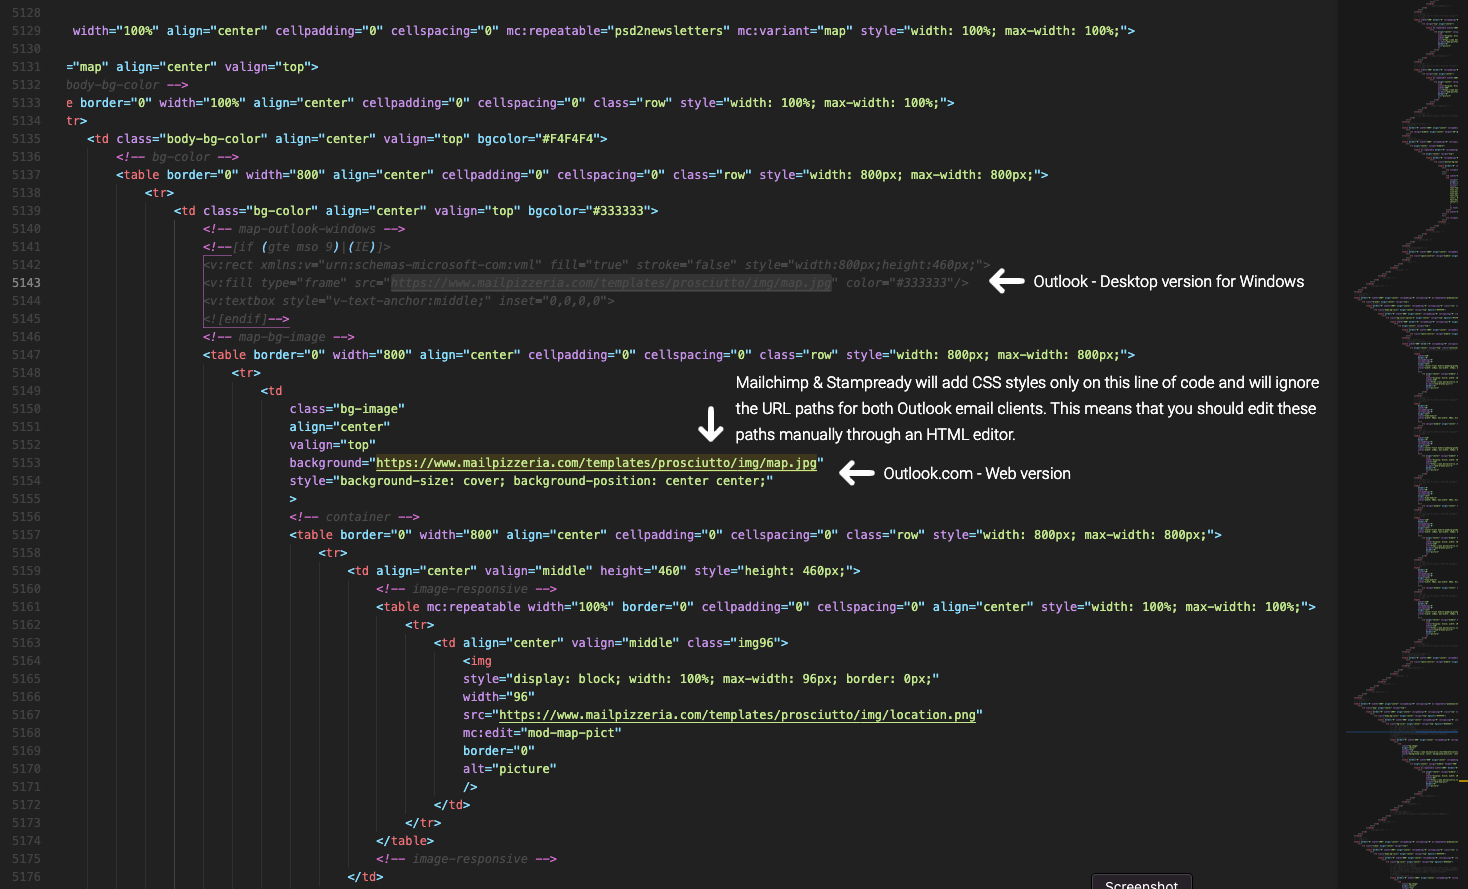
Unfortunately Outlook by default does not support background images. For our email templates we add some code that Outlook can read and understand, which means that now can display the background images. The bad news is that Mailchimp and Stampeady cannot read this part of code so when you update a background image using these email services Outlook will still display the default background images. On the following screenshot you can see which part of code you should update manually by editing the HTML through an HTML editor. As you notice, you should do that twice. One for Outlook desktop version for Windows and one more for Outlook.com which is the web version of Outlook.
